Ever cringed at the sight of your dirty alloy wheels? You’re not alone. Cleaning them can seem daunting, but don’t worry, we’ve got you covered.
This guide explains how to clean your alloys properly, including when WD40 is useful and when it is not. It then covers the rest of wheel care: dealing with brake dust, looking after your wheels through the seasons and the weather, protecting them on long journeys, and how long alloy wheels last.
So, let’s roll up our sleeves and make your wheels the envy of the neighbourhood!
Key Takeaways
– WD40 is a water displacing spray, not a wheel cleaner. It is handy for lifting sticky spots such as tar, but use a pH-neutral alloy wheel cleaner for routine cleaning.
– Brake dust contains metal particles and can stain the finish if it is left on, so clean it off regularly.
– Always clean wheels when they are cool, and use soft brushes and microfibre cloths, never wire brushes or harsh chemicals.
– Clean more often in winter, when road salt and grit attack the finish, and check your wheels each spring.
– Check your wheels and tyres before and after long journeys, and have any crack, bend or vibration inspected.
– Alloy wheels have no fixed lifespan. How long they last depends on the roads, your driving and how well they are looked after.
Understanding the Basics of WD40
WD40 is a common product in many garages. Its formula is based on mineral oil and petroleum-based hydrocarbons, with a propellant to spray it out of the can.
Its main job is to displace water, hence its name: Water Displacement, 40th formula. It is a light lubricant that can also penetrate and loosen dirt.
On alloy wheels, WD40 is most useful for lifting sticky residue, such as tar spots or old adhesive left behind by wheel weights. It is not designed as a wheel cleaner and it leaves an oily film, so use it on stubborn spots only and always wash it off afterwards with a proper wheel cleaner or car shampoo.
Gathering Necessary Cleaning Materials
Before you begin, gather everything you need. Having the right materials to hand makes the job quicker and safer for your wheels.
You’ll want to choose items that aren’t only useful but also safe for both you and the environment. Your list should include:
– A pH-neutral wheel cleaner made for alloy wheels: this is your main cleaning product.
– WD40: for stubborn sticky spots only.
– A soft wheel brush and a soft cloth or sponge: to clean the face, spokes and inner barrel without scratching.
– Microfibre cloths: for drying.
– A garden hose or a bucket of water: for rinsing your wheels.
– A pair of gloves: to protect your hands.
– A wheel sealant or wax: to protect the finish once the wheels are clean.
It’s worth noting that there are green alternatives to some of these materials. For instance, you can opt for biodegradable sponges instead of regular ones. Similarly, reusable cloths can replace single-use rags, reducing waste and promoting sustainability.
Now that you’ve got your tools ready, let’s move on to the next step: prepping your alloy wheels.
Get your free quote today
Prepping Your Alloy Wheels
Once you’ve gathered all your materials, it’s time to prep your alloy wheels. Alloy wheels are made from aluminium mixed with other metals, which gives them strength and a sleek, shiny appearance. Most have a painted or diamond cut face with a clear protective coating (lacquer) on top.
Make sure the wheels are cool before you start. Hot wheels make brake dust stick harder and can make cleaning products dry on the surface, so wait until they are cool to the touch after driving.
Next, rinse off loose dirt and grit with water. This step stops grit being rubbed into the surface and scratching the wheels while you clean.
The protective coating is what keeps your wheels looking good, and aggressive scrubbing or the wrong cleaning products can damage it. That’s why a pH-neutral wheel cleaner should do most of the work, with WD40 kept for the odd stubborn spot.
With your wheels prepped, you’re ready to start the cleaning process.
Cleaning Your Alloys, and Where WD40 Fits In
Work on one wheel at a time, in a well-ventilated area. Here is a simple step-by-step guide:
– Spray the pH-neutral wheel cleaner over the whole wheel and leave it for the time given on the bottle, so it can break down the grime.
– Using a soft bristle brush, gently scrub the face, between the spokes, around the wheel nuts and the inner barrel, where brake dust builds up.
– For tar spots or sticky residue that will not shift, spray a little WD40 onto a soft cloth and work it gently over the spot.
– Rinse thoroughly with clean water. Make sure no cleaner or WD40 is left behind, as residue attracts dirt and can mark the finish over time.
– Dry each wheel with a clean microfibre cloth to prevent water spots.
Avoid acidic cleaners, including vinegar, as well as oven cleaner and brake cleaner. These are too harsh for alloy wheels and can damage the lacquer. If you use a pressure washer, choose a gentle setting and keep the nozzle well back from the wheel, as blasting the surface up close can lift the finish.
Now that your wheels are clean, let’s look at how to keep them that way.
Post-Cleaning Wheel Maintenance
With the grime gone, a little upkeep will keep that fresh look for longer. Start with your tyre pressures. Checking them regularly keeps your wheels and tyres in good condition and helps your car handle safely. Check your tyre pressure at least once a month and before long journeys, with the tyres cold. Use a reliable tyre pressure gauge and check your vehicle handbook for the correct pressure.
Next, protect the finish. A wheel sealant or wax adds a layer that makes it harder for dirt and brake dust to stick, and makes the next clean much easier. For longer-lasting protection, a professional ceramic coating is another option worth asking about.
Rinse your wheels regularly to remove loose dirt and brake dust, and dry them with a soft, non-abrasive cloth to prevent scratches. If you often catch kerbs when parking, rim protectors can help guard the edge of the rim.
How to Remove Brake Dust
Brake dust forms when your brake pads rub against the brake discs. Every time you brake, tiny particles of metal and pad material are released and settle on your wheels. It is the main reason alloy wheels go from shiny to dull and grey.
Brake dust is more than a cosmetic problem. Because it contains metal particles, it can stain and eat into the protective coating if it is left on for long periods. Heat and moisture make it bond more firmly, so the longer you leave it, the harder it is to remove.
Removing Brake Dust Safely
– Wait for the wheels to cool, then rinse off loose dirt.
– Use a pH-neutral cleaner made for alloys. For stubborn build-up, an iron fallout remover made for wheels can help dissolve the metal particles.
– Use soft brushes or microfibre cloths only. Never use wire brushes or rough pads, as these scratch the finish.
– Let the cleaner work for the time given on the bottle, then rinse well so no residue is left.
– Dry the wheel and check for missed areas, then apply a sealant or coating to make future cleaning easier.
Keeping Brake Dust Down
Clean your wheels every two weeks or so for normal driving, and more often if you do a lot of town driving with frequent stops. Smooth, gradual braking produces less dust than harsh braking. When your brake pads are next replaced, you could also ask about low-dust brake pads.
If the dust will not come off with normal cleaning, it has probably etched into the surface. Do not reach for stronger chemicals, as these will make the damage worse. Staining like this usually needs professional alloy wheel refurbishment.
Seasonal Wheel Care
Autumn and Winter
In winter, councils spread salt and grit on the roads. This keeps drivers safe, but salt is corrosive and grit causes tiny scratches that let moisture reach the metal underneath. Rinse your wheels more often in winter, especially after driving on gritted roads, and do not leave salt sitting on them for weeks. Icy roads and poor visibility also make it easier to catch a kerb, so take extra care when parking.
Spring Check-Up
Spring is the time to give your wheels a thorough clean and a close look for winter damage. Here is what to look for:
– Kerb scuffs and scratches: surface damage that can let corrosion in. Consider kerb damage repair or refurbishment.
– Bubbling or flaking paint: usually corrosion starting under the finish. Our guide to repairing corroded alloy wheels explains the options.
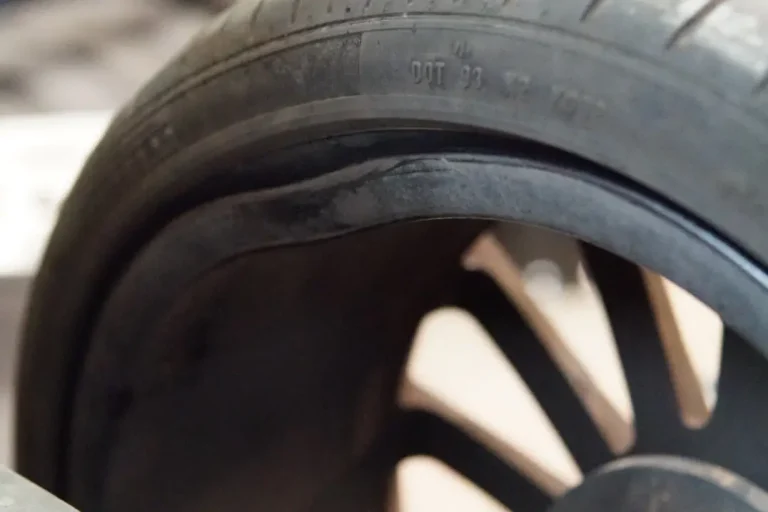
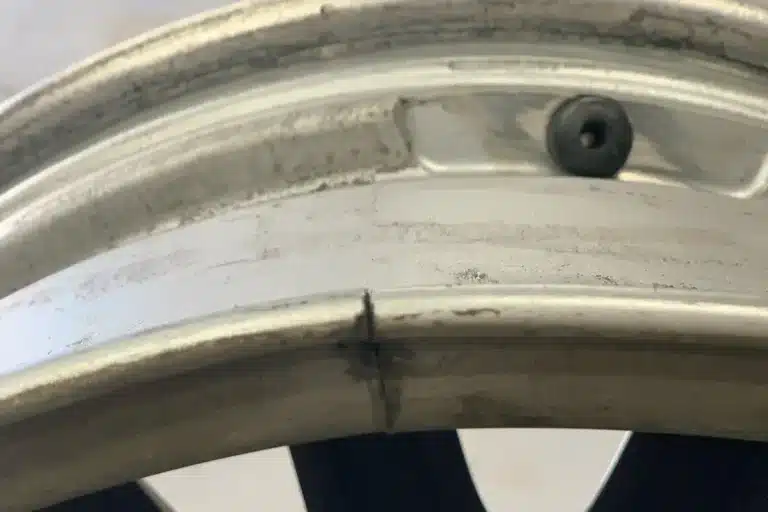
– Cracks in the alloy: structural damage. Have the wheel inspected straight away, as a cracked wheel can be unsafe. See cracked wheel repair.
– Vibration when driving: a possible buckled wheel. See buckled wheel repair.
– Uneven tyre wear: the wheel may be bent, or the wheels may be out of alignment. Have it checked by a specialist.
Summer
Strong sun can fade and dull the lacquer over time, so keep your wheels clean and topped up with sealant through the summer. Before a summer trip, check your tyre tread and look for cuts or bulges in the tyre sidewalls. The legal minimum tread depth for cars in the UK is 1.6mm across the central three-quarters of the tyre.
If you swap between winter and summer wheels, clean the set you are taking off and store it somewhere cool and dry, away from direct sunlight.
How Weather Affects Your Wheels
Rain on its own does little harm to a wheel with an intact finish. The trouble starts when water gets into chips and scratches, where it can cause corrosion under the coating. That is why small chips are worth fixing early, before they spread.
Snow and ice add road salt to the mix, and they can also hide potholes and kerbs, which makes impact damage more likely. After a cold snap, check your wheels for new damage and wash off any salt.
Whatever the weather, the same three habits protect your wheels: clean them regularly with a pH-neutral cleaner, check them for chips and cracks, and keep a protective sealant or coating on the finish.
Looking After Your Wheels on Long Journeys
Long trips bring extra risks for your wheels: unfamiliar roads, potholes hit at speed, heavier loads and tight service station car parks.
Before You Set Off
– Check your tyre pressures when the tyres are cold. Your handbook will show the correct pressure, and many cars need a higher pressure when fully loaded.
– Look over each wheel for scratches, chips, cracks or bends. Small damage can get worse on a long trip, so get anything worrying looked at before you go.
– Check your tyre tread depth and look for cuts or bulges.
On the Road
– Keep a safe distance from the car in front, so you have time to spot and avoid potholes and debris.
– Slow down steadily for potholes. If you cannot avoid one safely, hit it straight on rather than at an angle.
– Pack heavy items low and central, and do not go over your car’s maximum load.
– Take care in car parks and service stations, where tight spaces and high kerbs often cause kerb damage.
– When you stop for a break, walk around the car and look at each wheel.
When You Get Home
Wash off any road salt, mud and debris, and check the wheels again for new damage. Small kerb scuffs are common and are usually cosmetic, but it is worth booking an alloy wheel repair before they let corrosion in. If you notice vibration through the steering wheel or can see a crack or bend, have the wheel inspected before driving normally again.
How Long Do Alloy Wheels Last?
There is no fixed lifespan for an alloy wheel. A well looked after wheel can last for many years, while a single bad pothole can end a wheel’s life early. How long yours last depends on three things:
– Road conditions: potholes, rough surfaces and salted winter roads all speed up wear and damage.
– Driving habits: harsh braking, fast cornering and clipping kerbs all put extra stress on the wheel. Using tyres of the correct size for your wheels matters too.
– Care: regular cleaning, a protective sealant or coating, and fixing small chips early stop minor damage from becoming major damage.
Most cosmetic wear, such as kerb scuffs, faded lacquer and light corrosion, can be put right with refurbishment rather than buying a new wheel. Structural damage is different. A cracked or buckled wheel can be unsafe, and whether it can be repaired depends on where the damage is and how bad it is, so it must be assessed by a technician first.
When to Get Professional Help
Some wheel care you can do yourself, but some jobs need a specialist. Get professional help if:
– scratches have gone through the lacquer to bare metal
– paint is flaking, bubbling or peeling
– you can see or feel a crack in the alloy
– your car vibrates or pulls to one side
– your diamond cut wheels have lost their shine
– you want a colour change, for example with powder coating
For more warning signs, read our guide on how to tell if your alloy wheels need repair. Prices depend on wheel size, damage and finish, and you can see them on our price list.
Frequently asked questions
Can WD40 damage alloy wheels?
WD40 is not designed as a wheel cleaner. Used now and then on a stubborn spot and washed off afterwards, it is fine, but leaving its oily film on the wheel attracts dirt. For routine cleaning, use a pH-neutral cleaner made for alloy wheels.
How often should I clean my alloy wheels?
Every two weeks or so is a good routine for normal driving. Clean more often if you do a lot of town driving with frequent braking, and in winter, when road salt and grit can damage the finish.
What if brake dust will not come off?
If normal cleaning does not shift it, the brake dust has probably etched into the surface. Do not try stronger chemicals, as they will make the damage worse. Staining like this usually needs professional refurbishment.
Can pressure washing damage alloy wheels?
It can if you blast the wheel up close. Use a gentle setting and keep the nozzle well back from the wheel, then finish the job with a soft brush and a pH-neutral cleaner.
What should I do if I hit a large pothole?
Stop when it is safe and look at the wheel for cracks, bulges or bends. Check that the car drives straight without vibration. If you notice any problem, have the wheel inspected before you carry on driving normally, as a cracked or buckled wheel can be unsafe.
How long do alloy wheels last?
There is no fixed lifespan. It depends on the roads you drive on, how you drive and how well the wheels are looked after. Cosmetic wear can usually be put right with refurbishment, but a cracked or buckled wheel must be assessed by a technician first.
Conclusion
Looking after alloy wheels does not take much time. Clean them regularly with the right products, keep WD40 for the odd stubborn spot, protect the finish, and check your wheels after hard winters, long trips and big potholes. Catching problems early keeps your wheels looking good and helps keep them safe.
If your wheels need more than a clean, our workshops in Romford, Dartford and Hemel Hempstead offer alloy wheel refurbishment, diamond cutting, powder coating and crack repair. Alloy Fix is the only company to offer a 3 year warranty on all powder coating and diamond cut wheels, crack repairs come with a 1 year warranty, and loan wheels mean you can drive away the same day.